A useful body-art photograph lets someone judge the work clearly. It shows the design, its placement and the detail without lighting or editing disguising the result. A consistent set of phone photographs can do this better than an expensive camera used differently every time.
Build a repeatable photography setup
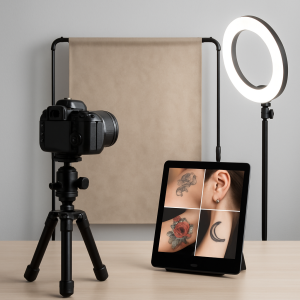
Choose a plain background and soft, even light. Avoid mixing a warm ceiling light with a cool window: the same piece can appear different across the frame. Keep the camera lens clean, tap to focus on the work and check the full-size image before finishing. Take another photograph if the detail is blurred rather than trying to rescue it with heavy sharpening.
Use the same position, distance and lighting for comparable photographs. Keep the camera reasonably square to the area you want to show; an extreme angle can distort proportions. Leave a little room around the design so that you can make a tidy crop later.
Take three views, each with a purpose
- Placement: a wider view that shows where the work sits.
- Overall result: the complete design, with no edges missing.
- Detail: a sharp close-up that shows the finish without digital zoom hiding the quality.
For practice assignments, show the whole practice sheet as well as your strongest detail. Your tutor needs to see consistency across the exercise, not just the best few centimetres. Label synthetic-skin work as practice rather than presenting it as a client result.
Edit the photograph, not the workmanship
Crop distractions, straighten the frame and make modest exposure adjustments. Keep skin colour and pigment appearance credible. Avoid smoothing away uneven lines, replacing backgrounds with parts of another tattoo, or using generative tools to improve the actual result. Keep the original file so you can compare an edited version against it.
Label fresh and healed photographs accurately. If you share a before-and-after pair, use comparable framing and lighting, and state which stage each picture shows. A dramatic filter can make a feed look consistent while making your portfolio less informative.
Make sharing a separate conversation
Ask permission before publishing a client photograph and agree what may be shown. A close crop may still contain an identifying feature. Do not assume that agreeing to a photograph for your records means agreeing to public social-media use.
A simple practice assignment
Photograph one finished practice design in three views. Select the clearest image, write a factual caption describing the exercise, and note one thing you would improve in the next session. Build your portfolio from this repeatable process instead of collecting unrelated images with different filters.
Prepare a feedback set, not just a highlight
For a practice submission, give the three views the same exercise reference and date. Keep the unedited files with them. Write one question that the photographs can actually answer, such as whether spacing is consistent across the whole practice sheet. If a photograph cannot show the issue clearly, retake it before requesting feedback. Separating the complete exercise from a social-media crop makes it easier to compare your next attempt and avoids judging progress from one unusually good detail.
Continue your study in Canada
For structured study, explore the online tattoo course or online piercing course for learners in Canada. Review the course outline and current options before choosing your training.
Ask the Skinart team about your learning plan if you need help matching a course to the skills you want to practise.