How to Practice Microblading at Home (Without a Client)
Practice Microblading at Home is a realistic and safe way for aspiring artists in the United States to refine their eyebrow skills without a live client. Whether you’re enrolled in an accredited online Microblading course or working on your technique between client appointments, structured at-home practice builds the muscle memory and design instincts that lead to professional results.
Over the next several thousand words, we’ll offer a comprehensive, step-by-step guide on setting up an effective home practice routine that mirrors studio standards — including tool selection, hygiene, stroke work, practice mediums, common mistakes to avoid, and how to track progress. The tips below are tailored to United States students and reflect safety guidance and accredited training best practices.
Written by Gary Erskine, 25 years in microblading education — lead author and tutor at Skinart United States. Gary has trained thousands of students worldwide and his guidance here reflects both classroom-tested exercises and real-world troubleshooting.
Table of Contents
Use the links below to jump to any section. We recommend bookmarking this page and coming back to specific exercises as you progress.
- Why Practice Microblading at Home Matters
- Tools, Materials, and a Studio-Quality Home Setup
- Technique Exercises: Strokes, Pressure, and Angles
- Common Mistakes to Avoid When Practicing Alone
- Sanitation, Aftercare, and Safety at Home
- Tracking Progress: Logs, Photos, and Feedback
- Legal, Insurance, and Local Regulations in the United States
- Frequently Asked Questions
- Final Thoughts & Next Steps
- Skinart United States Microblading Course
Why Practice Microblading at Home Matters
Practising microblading at home without a client is about building repetition, confidence, and a refined eye for eyebrow symmetry and strokes. In the United States, where licensed practice and hygiene standards are strict, at-home practice gives trainees a controlled environment to focus on fundamentals before performing on paying clients. This is particularly important for students balancing family or work commitments — a structured home training routine can accelerate learning without compromising safety.
When you practice microblading at home, you concentrate on the core elements: hair-stroke consistency, hand stability, pressure control, mapping, and colour theory. Each session should have an objective: for example, “today I’ll practice 200 hair strokes at consistent angle and depth,” or “today I’ll refine my 7-point eyebrow mapping on three different face shapes.” This incremental, goal-driven approach replaces haphazard practice with measurable improvement.
Practice Microblading at Home also allows you to experiment with ergonomics, lighting, and magnification tools so that when you return to treating clients (or begin doing so after certification), your setup supports precision rather than getting in the way. Skinart United States emphasises that careful, methodical at-home practice is a complement to accredited training — it’s not a substitute for supervised live training when that is required by local regulation.
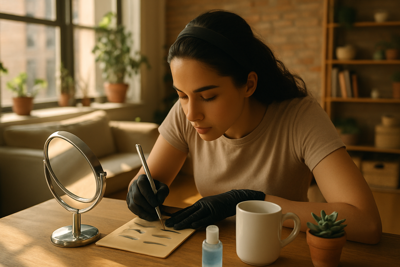
Tools, Materials, and a Studio-Quality Home Setup
Setting up your home practice station properly is one of the most important steps for safe, productive learning. Good lighting, an ergonomic chair, a stable practice surface, and a magnifier or lamp with a daylight bulb can dramatically improve the quality of each practice session. Remember: while Skinart United States provides accredited online instruction, we do not supply microblading equipment in the United States — students must source their own practice materials through reputable suppliers.
- Pros: Flexible scheduling, no pressure from a live client, the ability to repeat strokes until consistent.
- Cons: Lack of immediate live feedback from an instructor, no real-skin feedback sensation except via advanced practice skins or pigskin, and the temptation to skip sanitation steps if practicing informally.
To replicate a studio environment, choose practice skins that simulate human epidermis. Two common options are synthetic silicone practice skins and pigskin (when ethically sourced and permitted). Silicone skins are reusable for non-invasive practice and are excellent for initial strokes; pigskin gives a closer sensation to human skin but is less common in U.S. at-home practice due to handling and disposal considerations.
Supplies you’ll need if you plan to practice microblading at home include sterile microblading blades or cartridges (for practice, consider disposable practice pens that fit blades), practice skins, mapping tools (calipers and rulers), brow pencils, pigments (or pigment substitutes for non-invasive practice), magnifying lamp, latex or nitrile gloves, antiseptic wipes, and a waste bin with a tight lid. Always follow local disposal rules for sharps and biohazard materials.
Technique Exercises: Strokes, Pressure, and Angles
Technique is everything in microblading. Practising microblading at home should focus on three technical pillars: stroke formation, consistent pressure, and correct blade angle. Stroke formation combines wrist movement and finger stability. Begin each session with warm-up strokes on paper or a practice pad: short, medium and long hair-stroke repetitions. Work on tapering the start and finish of each stroke — a realistic hair stroke is not a straight line of uniform thickness.
Pressure control is the single most common beginner challenge. Too light and the pigment won’t implant; too heavy and you’ll scar. Use practice skins that provide feedback and aim to make strokes that are consistent in depth and thinness. If your practice medium is pigskin or high-grade synthetic skin, simulate pigment loading by using a safe ink or washable paint so you can visually assess pigment distribution and stroke depth without using real pigment.
Angle and hand positioning change depending on the brow zone and the natural hair direction. A good at-home exercise is “the 5-angle drill”: draw 50 strokes at 35°, 45°, 55°, 65°, and 75° respectively, then assess which angles produce the most natural taper and minimal trauma. Repeat this drill weekly until the results are repeatable across multiple skins and lighting conditions.
- Daily 15-minute warm-up strokes on paper (50 strokes total)
- Weekly 5-angle drill (250 strokes across five angles)
- Monthly mapping practice using three face shapes
- Pressure ramp exercise: gradually increase pressure over 30 strokes and then reduce over 30 strokes
- Symmetry exercise: map and mirror two brows on practice skin
- Colour pick testing on synthetic skin patches
- Micro-detailing: 25 ultra-fine finish strokes per session
- Time-trial practice: accurate strokes under time pressure to simulate client sessions
- Video-recorded technique review once per week for self-critique
Common Mistakes to Avoid When Practicing Alone
- Skipping mapping and jumping straight into strokes
- Using dull blades or reusing blades between practice sessions
- Practising without adequate lighting or magnification
- Neglecting sanitation protocols, even for practice
- Relying only on one type of practice skin (limits adaptability)
- Not timing sessions to simulate real client appointments
- Failing to document progress with photos and notes
- Comparing early results to advanced artists and giving up too soon
Practicing at home without a client removes the immediate feedback loop of a live session. To compensate, set deliberate practice rules: always map first, always use a fresh practice blade per skin, and always wear gloves and clean the area. Treat each session as though it were a real client appointment — that mindset maintains professionalism and builds good habits.
Another common trap is perfectionism. In the early weeks, your strokes will be inconsistent. That’s expected. Instead of judging each session harshly, log objective metrics like number of clean strokes, average stroke length, and angle accuracy. Over time, these objective measures will show clear progress even when your eye misses incremental improvements.
Sanitation, Aftercare, and Safety at Home
Even when practising without a client, you must treat sharps and practice instruments with respect. Dispose of used blades in a proper sharps container and follow local regulations for biohazard disposal. Use nitrile gloves and change them when contaminated. Keep a small kit for cleaning and disinfecting your station — surface disinfectant wipes (EPA-registered) are recommended for non-porous surfaces.
- Always wear gloves when handling blades or practice skins
- Use a dedicated, easily cleaned practice surface
- Store pigments and supplies in sealed containers to avoid contamination
- Dispose of single-use items in approved sharps containers
- Clean and disinfect reusable tools according to manufacturer guidance
- Label practice materials and avoid using studio pigments on non-approved surfaces
- Keep an incident log in case of accidental cut or exposure during practice
- Adopt a “no food/no drink” policy around your practice area
Aftercare practice might seem irrelevant without a live client, but it’s valuable to simulate the full appointment cycle. Create mock aftercare instructions and read them aloud as if explaining to a client — this builds communication skills. Additionally, practice photographing healed results on synthetic skins using consistent lighting and angles; learning to document healing stages is a key studio skill.
Include a safety checklist posted near your station that you follow before each session: mapping check, blade/pen integrity check, glove change, surface disinfected, lighting and magnifier in place, and camera/phone ready for progress photos. These small rituals ensure each practice session mirrors professional workflows.
Tracking Progress: Logs, Photos, and Feedback
Objective progress tracking separates hobbyists from professionals. Maintaining a practice log helps you identify patterns and areas for improvement. After every session, record the date, the type of exercise performed, total strokes, blades used, skin type (practice medium), and three notes on what went well and what to improve next time. Over weeks and months, these entries will highlight growth and recurring errors.
Photography is essential. Use consistent lighting, the same camera angle, and neutral backgrounds. Label your images with dates and the exercise type. Consider a weekly “progress board” where you pin before-and-after images from the same drill — visually seeing improvements is motivating and an excellent discussion tool for online instructor feedback or peer review.
- Daily log template: date, drill, strokes, notes
- Photo checklist: camera, light temperature, angle, distance
- Weekly review: compare 3 photos from the same drill
- Peer review: share weekly images with a trusted study group
- Instructor feedback: submit labelled photos for critique
- Confidence metric: rate each session 1–10 for technique confidence
- Correction plan: list two specific adjustments for next session
- Celebrate milestones: first time achieving 90% stroke consistency
At Skinart United States we recommend students schedule monthly remote assessments with their tutor. Even with at-home practice, seeking periodic expert feedback will refine technique faster than solitary practice alone. Our online microblading course includes modules on how to photograph and submit work for critique — a valuable complement to home drills.
Legal, Insurance, and Local Regulations in the United States
Practicing microblading at home is distinct from offering treatments. In the United States, many states and municipalities have specific licensing, blood-borne pathogen (BBP) training, and sanitation requirements for tattooing and microblading. Before moving from home practice to treating clients, verify your state’s cosmetology, esthetician, or tattooing regulations. Some states require a licensed premises or a specific tattoo establishment permit.
Insurance is another consideration. Most professional liability insurers require that treatments be done in an approved, licensed environment. Practising at home for skill development does not usually violate insurance terms, but offering paid treatments from a residential address may. Check your professional insurance policy and municipal business licensing rules before converting your home practice into a client-facing service.
We include a short statement from a local regulatory official to illustrate how seriously municipalities treat licensed practice. “Local health departments require all invasive skin procedures to be performed in inspected facilities that meet sterilisation and drainage standards,” says a municipal public health spokesperson in a midwestern city. This is why at-home practice should remain practice-only until all legal requirements are met for client work.
Frequently Asked Questions
Below are answers to common queries about how to practice microblading at home without a client. These are phrased the way students often search and are designed to be quick, actionable responses.
Can I really learn to microblade at home?
Yes — you can learn the core technical skills through structured at-home practice, especially when paired with an accredited online course for feedback and theory; however, check local regulations before performing live treatments on clients.
What practice skins are best for beginners?
Silicone practice skins are ideal for beginners because they’re consistent, reusable for non-invasive drills, and safer to handle at home; pigskin gives closer feedback but requires careful handling and disposal.
How often should I practice to get good?
Short, frequent sessions (20–45 minutes, 4–6 times per week) focused on targeted drills are more effective than long, irregular sessions; consistency builds muscle memory and stroke reliability.
Do I need to use real pigment for practice?
No — using washable inks or pigment substitutes for visual feedback on practice skins is common and safer for at-home practice; real pigments are reserved for supervised training and client treatments.
How do I get feedback if I practice alone at home?
Document each session with labelled photos and submit them to your course tutor or a peer review group; Skinart United States offers remote assessment in its accredited online microblading course for meaningful critique.
Final Thoughts & Next Steps
Practising microblading at home without a live client is a disciplined, highly effective way to develop core technical competence. By building small, repeatable drills, tracking progress, and maintaining rigorous sanitation, you create a bridge from theory to confident client work. We recommend combining at-home practice with an accredited course so you can submit work for professional review and ensure you meet local legal and safety standards in the United States.
At Skinart United States, our online Microblading course provides the structure, syllabus, and tutor feedback to turn your at-home practice into a publishable portfolio. Remember: we do not provide microblading equipment in the United States, and our courses are online only — there is no in-person training offered for Microblading in the United States.
If you’re ready to take your home practice to the next level and gain accredited tutoring and assessments, take the next step below.
Skinart United States Microblading Course
If you’re serious about converting home practice into professional skill, our accredited online microblading course is tailored to United States students and includes tutor-led assessments, practical modules on mapping and colour theory, and guidance on preparing client documentation and aftercare. Click below to learn more and enroll.