Eyebrow Mapping 101: The Foundation of Microblading
Eyebrow Mapping 101 is the essential starting point for any practitioner who wants to offer consistent, beautiful microblading results. Whether you’re just starting your microblading journey or sharpening your client-consultation skills, mastering eyebrow mapping gives you the precision and confidence clients expect. In this guide, we’ll break down the fundamentals, common pitfalls, and pro-level tips you can apply immediately in a United States practice.
Accurate mapping isn’t just about symmetry; it’s about tailoring brows to each client’s facial anatomy, lifestyle, and aesthetic goals. This post draws on decades of professional experience and evidence-based hygiene recommendations to give you a practical, step-by-step resource. You’ll also find how Skinart United States structures its accredited Microblading course so you can turn these techniques into a reliable skill set.
Written by Gary Erskine, 25+ years in eyebrow and microblading education — this article combines classroom-tested techniques, real U.S. salon examples, and clear explanations so you can apply Eyebrow Mapping 101 in your next consultation.
Table of Contents
Use the links below to jump to any major section. Each heading has an anchor so you, and search engines, can quickly find the right information.
Introduction to Eyebrow Mapping
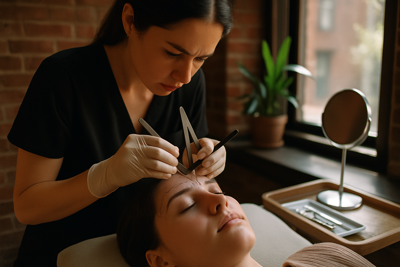
At its core, Eyebrow Mapping 101 is about visual and anatomical analysis. The process uses measurements, proportional rules, and client preferences to design a brow template that will guide every stroke during microblading. A solid mapping ensures you respect facial asymmetries while still achieving an overall balanced look.
In the United States, clients expect predictable results and a professional consultation process that addresses shape, tone, and post-care. Mapping gives you the shared language to explain why certain shapes work better than others. Throughout this article we’ll reference the classical rules—like the golden ratio influences and facial thirds—but always contextualize them for practical microblading application.
For students and new technicians, Eyebrow Mapping 101 is the difference between inconsistent outcomes and repeatable results. When taught correctly, mapping becomes second nature: a simple set of marks and checks that guide needle angle, hair direction, and pigment placement.
Why Mapping Matters in Microblading
Eyebrow Mapping 101 is not an optional nicety — it’s a procedural cornerstone. Mapping directly reduces rework, improves client satisfaction, and helps you communicate a realistic outcome before the first stroke. In training and in practice, mapping protects both the client and the artist by creating agreed-upon boundaries and expectations.
- Pro: Creates clear symmetry and personalised shaping
- Pro: Facilitates faster, more confident strokes during microblading
- Pro: Helps document case notes for future touch-ups
- Con: Requires practice to master
- Con: Overreliance on templates can ignore individual anatomy
Mapping often reduces friction in the consultation. When clients see the design and understand the logic behind brow choices, they’re quicker to consent and feel more in control. That consent process is particularly important in U.S. clinics where state regulations emphasize informed consent and record-keeping.
Finally, learning to adapt mapping methods for different ages, ethnicities, and facial structures is part of advanced practice. For example, older clients often benefit from slightly fuller arches to counter natural hair loss; younger clients may prefer a softer, straighter shape. Eyebrow Mapping 101 gives you the baseline from which you can tailor these variations.
Tools, Measurements, and Ratios
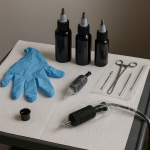
Eyebrow Mapping 101 relies on a few simple tools: a flexible brow ruler, calipers, cotton swabs, a white eyebrow pencil, and a reliable measuring system (the golden ratio and facial thirds are helpful guides). Start by marking three key points: the start, arch, and tail. Then connect them with light, feathery strokes to preview the final silhouette.
Consistency depends on measurement technique. For example, use the nose as a vertical anchor to determine the start point: align the ruler from the lateral edge of the nostril vertically through the pupil area. The arch usually sits over the outer edge of the iris when the client looks straight ahead. These classic rules are taught in Eyebrow Mapping 101 and then adapted to facial asymmetries.
When you combine these measurements with qualitative checks — such as the client’s hair density, skin texture, and facial movement — you’ll produce a mapping that’s both mathematically balanced and visually flattering.
- Flexible eyebrow ruler (metric and imperial markings)
- Calipers for symmetrical checks
- White or light-colored eyebrow pencil for temporary marks
- Measuring tape for larger facial proportions
- Ruler with protractor for arch angle
- Magnifying lamp for fine detail
- Disposable cotton swabs and antiseptic wipes
- Photographic documentation tools (good smartphone camera)
- Consent forms and mapping photos for client records
Common Mapping Mistakes to Avoid
Even experienced artists can make mapping errors that affect outcomes. Here are frequent issues and how to avoid them.
- Relying solely on perfect symmetry—human faces are asymmetrical by nature
- Placing the arch too high based on trends rather than anatomy
- Using a single template for all clients
- Not checking mapping with the client seated and standing (gravity changes)
- Failing to document and photograph the agreed design
- Ignoring eyebrow hair direction when planning strokes
- Over-mapping (making too many dark guide lines that confuse microblading strokes)
- Ignoring ethnic and age-related differences in brow placement
- Not accounting for past eyebrow procedures or scars
Avoiding these mistakes comes down to slow, intentional practice during training. During Skinart United States’ accredited Microblading course, students practice multiple mapping scenarios across age groups and ethnicities so they can internalize when to break the “classical” rules in favor of better client outcomes.
One practical tip: always step back and look at the mapping from a meter away and in photographs before starting microblading. Photographs reveal small imbalances the naked eye may miss and form an excellent record for your client file.
Step-by-Step Mapping Workflow
Below is a repeatable mapping workflow you can use in clinic. These steps are also taught comprehensively in Skinart’s Microblading course, with live demonstrations and supervised practice.
- 1. Client posture & photo: Seat the client upright, neutral expression, and take reference photos from frontal and 45-degree angles.
- 2. Clean the area: Use safe, non-irritating cleansers; ensure the skin is free of oils.
- 3. Mark the vertical start point: Align a straight tool from the alar base to the brow.
- 4. Locate the arch: From the alar base through the lateral edge of the iris marks the highest arch point.
- 5. Determine tail end: Align from the alar base to the outer corner of the eye for the tail endpoint.
- 6. Check horizontal balance: Use calipers or a ruler to compare distances from the nose to each landmark.
- 7. Draw the top and bottom outlines: Lightly connect the points to preview the final brow shape.
- 8. Get client approval and photograph the approved map.
Each of these steps should be performed slowly during your early cases. As you gain experience, the process becomes quick and reliable. For difficult anatomy—like significant asymmetry or scarring—allow extra consultation time and consider a two-stage mapping approach: a primary mapping and a refinement after client feedback.
Remember, in the United States many states require documented consent and procedure notes. Photograph every approved mapping and attach it to the client record. This not only protects the artist legally but also provides a visual timeline for future touch-ups.
Client Consultation & Consent in the United States
In the U.S., proper consultation and documented consent are essential. A good consultation is where Eyebrow Mapping 101 meets client communication. This is the phase where you establish expectations, review medical suitability, and decide on color, density, and aftercare. Always ask about anticoagulants, recent facial procedures, and any keloid history.
- Discuss pigments and tone preferences; document final choice
- Complete a medical history and check for contraindications
- Explain the mapping process and why it benefits the outcome
- Get written consent for the procedure and photography
- Provide post-care instructions and emergency contact procedures
- Review pricing, follow-up appointments, and touch-up policy
- Confirm client understands healing stages and pigment evolution
- Record the agreed map in the client’s file with photos
Many U.S. states require bloodborne pathogen training and specific disposal and sanitation standards; consult your local public health regulations. The CDC offers guidance on infection control practices that can inform your studio policies, and training providers like Skinart include compliance and safety in their curriculum.
For practical examples, Skinart United States students complete case studies in which they document the consultation and approved mapping. This builds a professional file and gives technicians confidence when explaining decisions to clients.
Advanced Mapping Tips & Variations
Once you understand Eyebrow Mapping 101 basics, explore these advanced tips to handle more challenging cases. These are techniques we emphasize in Skinart’s Microblading curriculum for experienced students who wish to refine their outcomes.
Advanced mapping equips you to address facial asymmetry, previous tattoo corrections, and artistic client requests. The goal is to create a design that still looks natural and ages well with the client.
Below are practical options and variations to include in your mapping toolkit.
- Split mapping for asymmetry — design each brow independently, then harmonize overall balance
- Scar camouflage mapping — plan stroke direction and density to mimic native hair across scar tissue
- Soft-mapping for sparse, delicate brows — keep the top line light and feathered
- Angular mapping for structured looks — slightly sharper arch for stronger facial frames
- Gender-adapted mapping — masculine brows often need straighter lines and denser tails
- Age-adapted mapping — fuller, softer fronts for mature clients to restore youthful proportions
- Combining microblading with ombré techniques — map for a blended, powdered tail when needed
- Mapping for corrective cases — plan staged approaches for color correction and shape correction over multiple sessions
Eight (and More) Mapping Mistakes: What to Watch For
- 1. Using the client’s current brow as the only guide (it may be inherently unbalanced)
- 2. Marking while the client is reclining — posture affects proportions
- 3. Drawing heavy guide lines that bleed into microblading strokes
- 4. Ignoring client face shape—one shape doesn’t suit all
- 5. Over-sharpening arches to follow trends rather than anatomy
- 6. Failing to check mapping in photography and different lighting
- 7. Not aligning start points with the nasal base for accurate horizontal balance
- 8. Forgetting to factor hair direction into stroke planning
- 9. Skipping a second check after the client smiles or changes expression
- 10. Over-correcting a brow with too much pigment density
These common mapping issues often result from rushing or insufficient practice. The best prevention is structured repetition: practice mapping on live models, mannequins, and with photos. Training programs should provide progressive scenarios that mimic challenging clinic cases.
When you begin teaching others Eyebrow Mapping 101, stress the importance of documentation. Take photos before and after the approved map, and add notes about any adjustments. These records are invaluable when you’re planning follow-ups or handling corrections.
Practical Examples & U.S. Success Stories
To contextualise Eyebrow Mapping 101 for a United States audience, here are real-world examples from U.S. salons and Skinart United States alumni:
Example 1 — Chicago boutique: A client with uneven brows and a slightly deviated septum benefited from split mapping. The artist mapped each brow individually, documented the agreed changes, and staged the procedure across two sessions. The result was balanced brows that matched the client’s facial lines and healed naturally.
Example 2 — Los Angeles studio: A model with previous tattooing presented with heavily pigmented tails. Using corrective mapping, the technician created a softer front and used lighter strokes to blend the correction into natural hair direction. Before & after photos documented forward progress and were used to communicate expectations.
- Success tip: Always schedule a short pre-procedure mapping-only consult for complex corrections.
- Success tip: Use imagery to show healed results, not just fresh microblading, in your portfolio.
- Success tip: Document the client’s preferred daily makeup routine—this affects mapping choices.
FAQs — Eyebrow Mapping 101
Below are common questions clients and new technicians ask about mapping and microblading.
What is Eyebrow Mapping 101 in simple terms?
Eyebrow Mapping 101 is a systematic method for marking key brow points and outlines so microblading strokes follow a design tailored to the client’s anatomy and preferences; it gives both artist and client a visual blueprint before any pigment is placed.
How long does mapping take during a first consultation?
Mapping usually takes 10–25 minutes, depending on case complexity. Allow more time for corrective procedures or clients who need several design revisions.
Can mapping fix previous tattoo mistakes?
Mapping helps plan corrective strategies but cannot fully undo poor pigment choices in a single session; corrective cases often require staged approaches and careful color work to blend or lighten previous tattooing.
Do I need special tools to start mapping?
Basic tools include a flexible brow ruler, calipers, and a light eyebrow pencil. As you progress, professional calipers and photo documentation equipment become valuable additions.
Is mapping required for every microblading client?
Yes—mapping is recommended for every microblading client. Even quick touch-up cases benefit from a brief mapping to ensure continuity and symmetry with previous work.
Final Thoughts: Build Your Mapping Foundation
Eyebrow Mapping 101 is the foundation of consistent, beautiful microblading work. Investing time in mapping practice pays off in client satisfaction, fewer corrections, and a stronger portfolio. As you build experience, mapping will shorten your procedure times and increase confidence in complex cases.
Whether you’re a beginner or refreshing your skills, consider structured, accredited training that pairs mapping theory with supervised practice. Skinart United States’ online Microblading course provides a thorough curriculum—including mapping, consent procedures, and post-care—designed to help you launch or upgrade your practice in the United States.
Get hands-on guidance, documented workflows, and real case studies so you can apply Eyebrow Mapping 101 immediately and professionally.
Ready to Master Eyebrow Mapping 101?
Join Skinart United States’ accredited online Microblading course to learn mapping, sanitation, pigment theory, and professional client management. Our syllabus is CPD and BAQA aligned, designed for U.S.-based practitioners who want accredited, practical training.
Recent Blog Posts
- Studio Etiquette Update: Professionalism in 2026
 Workplace Etiquette for Body Art Studios Refresh your studio etiquette and build a reputation for professionalism with these up-to-date best practices.… Read More »Studio Etiquette Update: Professionalism in 2026
 - 🌙 Eid Mubarak: Celebrate with 5% Off in 2026!
 Eid Savings: 5% Off All Courses Celebrate Eid with a special offer: 5% off any course. Use code EID5 at checkout.… Read More »🌙 Eid Mubarak: Celebrate with 5% Off in 2026!
 - Top Mistakes New Body Artists Should Avoid (2026)
 Stay Ahead: Common Pitfalls for New Artists Read up on the most frequent errors new body artists make, and how to… Read More »Top Mistakes New Body Artists Should Avoid (2026)