Coil vs Rotary: Which is right for you?
Choosing between coil and rotary machines is one of the first technical decisions you’ll make. Both are widely used in the United States — coil machines have been industry standard for decades, while rotary machines have become increasingly popular for their quiet operation and ease of tuning.
Coil machine pros and cons
- Pros: Excellent for lining and shading when set up correctly; strong tactile feedback; many aftermarket parts and tunability.
- Cons: Heavier and louder; requires more frequent tuning and understanding of springs, contact gaps and armature alignment; steeper learning curve.
Rotary machine pros and cons
- Pros: Lightweight, quieter, consistent stroke and smooth motion, easier to run at varied voltages and with different needles; quick to set up for beginners.
- Cons: Less tactile feedback for some artists; certain rotary models are less suitable for heavy shading styles; repairs sometimes require specialized parts.
When preparing your machine, consider the work you want to do most often. Beginners often find rotaries easier to start with because they require fewer mechanical adjustments. Coil machines reward technical skill and offer unmatched control for lining when tuned properly. In Skinart United States’ online tattoo course we cover both systems, showing step-by-step setups so you can try both and decide.
Across the U.S., many studios use a hybrid approach — a coil for specific lining rigs and a rotary for colour and shading. Tattoo Machine Setup for Beginners explores how to set up both so you can switch confidently between them.
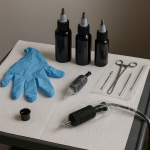
Essential tools and supplies for setup
Before you start setting up machines, assemble a clean, well-lit workspace and gather your tools. Tattoo Machine Setup for Beginners emphasises that good habits start with organising supplies and ensuring everything functions before you work on skin.
For beginners in the United States, there are local regulations about infection control and sharps disposal; having the right consumables and PPE helps meet those expectations. Below is a practical checklist of tools you will use regularly in setup and daily tattooing.
Collecting these items will let you set up reliably, tune with confidence, and keep sessions efficient. Skinart’s online course contains guided videos showing real-time setup using the tools listed below.
- Tattoo machines (one coil, one rotary recommended for comparison)
- Reliable power supply with voltage readout and compatible RCA/clip cord
- Clip cords and foot pedal (test spare cords for wear)
- Needle cartridges or traditional needles, assorted sizes for lining and shading
- Grips, tubes and tips (disposable or autoclavable depending on local rules)
- Rubber bands, grommets, and O-rings for coil machines
- Screwdrivers and hex keys for small adjustments
- Multimeter for checking power supply and continuity
- Isopropyl alcohol, green soap, and disinfectant wipes suitable for tattoo stations
- Barrier films, clip cord sleeves, and single-use covers
- Sharps container, biohazard bags and local-compliant waste disposal plan
- Spare springs and contact screws for coil tuning
- Lubricant recommended by the machine manufacturer for rotary cams, if applicable
- Headlamp or focused task light for close inspection
Step-by-step setup checklist (avoid these common issues)
- 1) Incorrect needle depth (too shallow or too deep)
- 2) Loose contact screw or poor spring tension on coil machines
- 3) Wrong voltage setting on the power supply for the chosen work
- 4) Worn grommets, rubber bands, or O-rings causing inconsistent performance
- 5) Bad or frayed clip cords causing intermittent power
- 6) Incorrect needle configuration for liners vs shaders
- 7) Poorly sterilised grips/tubes or improper barrier procedures
- 8) Skipping a test pass on fake skin or practice pad before client work
Each of the items above is a practical mistake that beginners make — and each has a simple preventive step. For example, always test needle depth on a practice pad, and check that springs and contact screws are secure before you clip in the cord. If you use rotary machines, verify the cam and motor mounts are snug; for coils, check the frame is straight and springs are undamaged.
Develop a pre-session routine: new disposable grips or disinfected grips, fresh needles, barrier film, and a functional foot pedal. This reduces stress mid-session and helps you focus on art rather than equipment hiccups.
Common mistakes and how to fix them
Many errors are easy to correct once you know what to look for. Here are practical corrections for frequent issues encountered while learning Tattoo Machine Setup for Beginners.
- Needle blowing out or falling back into the tip: check and reset needle depth and ensure vise or cartridge collar is tightened.
- Uneven lines: for coil machines, inspect spring alignment and contact gap; for rotaries, check stroke length and needle stability.
- Burning sensation on skin: likely too high voltage or needle depth; reduce voltage and retract needle slightly.
- Machine stalls intermittently: swap clip cord for another or test with multimeter to confirm continuity.
- Vibration from the stand or table: add rubber isolation pads under the power supply and machine box.
- Excessive noise from coil frame: tighten mounting screws and ensure springs are not touching the frame in unintended places.
- Poor shading performance: try a lower voltage for smoother ink flow or change to a round shader configuration.
- Inconsistent stroke: check armature bar seating on coil machines and motor mounts on rotaries.
When you hit a problem, use a systematic approach: isolate the component (needle, cord, power supply, machine), replace or test each item, and test on practice skin between adjustments. Logging your settings — voltage, needle depth, machine type — helps you reproduce good setups and avoids trial-and-error during client work.
In the Skinart United States course we provide downloadable checklists and video demonstrations so you can follow along and replicate settings accurately for both coil and rotary rigs.
Tuning your machine — practical steps
Tuning differs between coil and rotary but follows a common principle: small adjustments produce predictable changes. Tattoo Machine Setup for Beginners breaks tuning into clear actions so you can reach consistent performance quickly.
For coil machines, key tuning steps are spring alignment, contact screw gap, and armature travel. For rotaries, focus on stroke length, cam positioning and clip cord connections. Here’s a condensed tuning checklist you can use before every session.
- Secure the machine in a vise or stable mount and test run off the skin to hear the rhythm.
- Set needle depth to the desired protrusion based on the work (liners typically shorter than shading).
- Adjust voltage: start low and increase gradually until the machine feels responsive without causing overwork.
- For coils, gently bend the front spring to alter hit — small movements change spring tension significantly.
- Tighten or loosen the contact screw for a crisp hit; too wide a gap weakens the hit, too close causes shorting.
- For rotaries, check that the motor mount is firm and the cam is aligned with the needle bar to avoid binding.
- Always test on practice skin for at least 30 seconds to confirm ink flow and depth before client contact.
Recording your final settings (e.g., 7.2 V with 0.5 mm needle protrusion on a rotary for a certain shader) speeds up future setups and ensures reproducibility. This is a habit we teach in the online course to accelerate learning and reduce on-the-job mistakes.
Maintenance, cleaning and a quoted industry perspective
Routine maintenance prolongs machine life and keeps your work consistent. For beginners, maintenance is often overlooked — yet it’s essential. Clean grips and tubes between clients, check machines for frayed wires, and regularly replace consumables like O-rings and rubber bands.
Below, you’ll find a short routine that fits before and after each session, as well as a quoted statement from an industry body to reinforce the importance of proper procedures.
“Proper equipment cleaning and safe disposal of sharps are non-negotiable components of professional tattooing. Operators must follow local health department guidance to protect clients and themselves.” — Local Public Health Tattoo Safety Advisory, City of Los Angeles
We also include a maintenance checklist so you can adopt these routines immediately. The Skinart United States online course includes demonstrations on safe cleaning procedures that align with municipal guidance across the U.S.
- Wipe down power supply and surfaces with hospital-grade disinfectant after every client
- Replace disposable grips and tubes; if using autoclavable items, follow steriliser manufacturer instructions
- Inspect and replace clip cords showing wear; test continuity with a multimeter
- Change springs or contact screws that show fatigue or corrosion
- Lubricate rotary motor bearings only with manufacturer-recommended product
- Keep a log of machine service dates and parts replaced
- Ensure all sharps go into an approved sharps container; follow your state and local disposal rules
Safety, regulation and local U.S. examples
In the United States, tattooists must follow state and local health department rules. These rules typically govern sterilisation, sharps disposal, and sometimes bloodborne pathogen (BBP) certification. Tattoo Machine Setup for Beginners includes best practices that align with common U.S. requirements, but you should always check your local public health website for specifics.
Example: In California and many large U.S. cities, studios are inspected and must demonstrate compliant cleaning protocols, sharps management, and record-keeping. Many artists train with accredited providers to meet client expectations and municipal standards; Skinart United States’ certified online course covers the knowledge expected by local regulators.
Success story — a recent student based in Austin, Texas, completed our online tattoo course and used documented setup routines from the training to pass a studio onboarding inspection within two weeks of finishing the module. Small, consistent practices like checklists and test passes make a measurable difference during inspections.
FAQ — Tattoo Machine Setup for Beginners (Coil vs Rotary)
Below are common questions new artists ask about machine setup. Short, actionable answers help you move from reading to doing.
What is the easiest tattoo machine for beginners to set up?
Many beginners find rotary machines easier to set up because they have fewer mechanical parts to tune; you mainly set needle depth and voltage, then test on practice skin. Coil machines require more understanding of springs and contact screw gaps.
What voltage should a beginner use for a rotary machine?
A good starting point is 6.5–8.0 volts for rotaries, adjusting up or down depending on needle configuration and skin response. Always start lower and increase gradually while testing on practice skin before client work.
How do I know if my coil machine spring needs replacing?
If your coil machine loses its crispness, starts to make a spitting or inconsistent hit, or the armature bar doesn’t travel smoothly, springs may be fatigued. Replace springs when you observe play, corrosion, or inconsistent performance.
Do I need certification to set up tattoo machines in the U.S.?
Certification requirements vary by state and county. Many regulators require bloodborne pathogen (BBP) training or documented infection control training. Our accredited online tattoo course includes the knowledge expected by many local authorities, but always confirm local rules.
Does Skinart provide equipment in the United States?
Skinart United States provides accredited online training but does not supply tattoo equipment in the United States. Our course teaches how to choose and set up machines so you can procure the right gear locally.
Final thoughts — take the next step with confidence
Tattoo Machine Setup for Beginners is a practical skill that becomes reliable with repetition, testing, and good habits. Start with the basics — clean workspace, correct tools, test passes — and build from there. Whether you prefer the tactile feedback of coils or the simplicity of rotaries, mastering setup will make you a better artist and a safer practitioner.
If you’re ready to structure your learning and gain accredited knowledge recognised by industry bodies, Skinart United States’ online tattoo course is designed to walk you through these exact steps. You’ll get clear video demonstrations, downloadable checklists, and step-by-step guidance from experienced tutors.
Ready to master your setup?
Enroll in our accredited online tattoo course to learn setup, safety, and technique with expert feedback from Gary and the Skinart team.
Recent Blog Posts
- Studio Etiquette Update: Professionalism in 2026
 Workplace Etiquette for Body Art Studios Refresh your studio etiquette and build a reputation for professionalism with these up-to-date best practices.… Read More »Studio Etiquette Update: Professionalism in 2026
 - 🌙 Eid Mubarak: Celebrate with 5% Off in 2026!
 Eid Savings: 5% Off All Courses Celebrate Eid with a special offer: 5% off any course. Use code EID5 at checkout.… Read More »🌙 Eid Mubarak: Celebrate with 5% Off in 2026!
 - Top Mistakes New Body Artists Should Avoid (2026)
 Stay Ahead: Common Pitfalls for New Artists Read up on the most frequent errors new body artists make, and how to… Read More »Top Mistakes New Body Artists Should Avoid (2026)
Tattoo Machine Setup for Beginners (Coil vs Rotary)

Welcome — if you’re starting out, this guide to Tattoo Machine Setup for Beginners will walk you through the essentials for both coil and rotary machines. Whether you’re training to tattoo professionally in the United States or refining your home studio routine, understanding how to set up, tune, and maintain your machine is foundational. This article is written with beginners in mind and aims to make the coil vs rotary decision clear, practical, and safe.
Skinart United States offers accredited online tattoo training designed by industry tutors with decades of experience. Written by Gary Erskine, 25 years in Tattoo Machine Setup for Beginners education, this post combines technical details with hands-on tips to get you comfortable preparing machines for a real session.
Read on for a full walkthrough, setup checklists, common mistakes, and troubleshooting help that will speed up your learning curve and boost client confidence. We’ll also point you to accredited training should you wish to progress beyond self-study.
Table of Contents
Jump to any section — we use anchor-linked headings so Google may display “Jump to” links in search results. Click to navigate quickly through setup steps, tools, mistakes to avoid, and FAQs.
Why setup matters for Tattoo Machine Setup for Beginners
Proper setup is the difference between a smooth, comfortable session and a problematic one that stresses you and the client. Tattoo Machine Setup for Beginners focuses on giving you repeatable, practical steps so that you can rely on your kit to behave consistently. Beginners often underestimate how much small adjustments — spring alignment, contact screw gap, and needle depth — affect line quality and healing.
Getting setup right improves your control, reduces skin trauma, and cuts down time spent troubleshooting mid-session. As an accredited training provider, Skinart United States emphasises that technical competence builds client trust, which is essential in the U.S. marketplace where health and safety standards are enforced by local authorities.
We’ll cover both coil and rotary machines in this post so you can learn how to set each type up reliably. Tattoo Machine Setup for Beginners will give you a clear foundation before you invest in equipment or start taking clients.
Coil vs Rotary: Which is right for you?
Choosing between coil and rotary machines is one of the first technical decisions you’ll make. Both are widely used in the United States — coil machines have been industry standard for decades, while rotary machines have become increasingly popular for their quiet operation and ease of tuning.
Coil machine pros and cons
- Pros: Excellent for lining and shading when set up correctly; strong tactile feedback; many aftermarket parts and tunability.
- Cons: Heavier and louder; requires more frequent tuning and understanding of springs, contact gaps and armature alignment; steeper learning curve.
Rotary machine pros and cons
- Pros: Lightweight, quieter, consistent stroke and smooth motion, easier to run at varied voltages and with different needles; quick to set up for beginners.
- Cons: Less tactile feedback for some artists; certain rotary models are less suitable for heavy shading styles; repairs sometimes require specialized parts.
When preparing your machine, consider the work you want to do most often. Beginners often find rotaries easier to start with because they require fewer mechanical adjustments. Coil machines reward technical skill and offer unmatched control for lining when tuned properly. In Skinart United States’ online tattoo course we cover both systems, showing step-by-step setups so you can try both and decide.
Across the U.S., many studios use a hybrid approach — a coil for specific lining rigs and a rotary for colour and shading. Tattoo Machine Setup for Beginners explores how to set up both so you can switch confidently between them.
Essential tools and supplies for setup
Before you start setting up machines, assemble a clean, well-lit workspace and gather your tools. Tattoo Machine Setup for Beginners emphasises that good habits start with organising supplies and ensuring everything functions before you work on skin.
For beginners in the United States, there are local regulations about infection control and sharps disposal; having the right consumables and PPE helps meet those expectations. Below is a practical checklist of tools you will use regularly in setup and daily tattooing.
Collecting these items will let you set up reliably, tune with confidence, and keep sessions efficient. Skinart’s online course contains guided videos showing real-time setup using the tools listed below.
- Tattoo machines (one coil, one rotary recommended for comparison)
- Reliable power supply with voltage readout and compatible RCA/clip cord
- Clip cords and foot pedal (test spare cords for wear)
- Needle cartridges or traditional needles, assorted sizes for lining and shading
- Grips, tubes and tips (disposable or autoclavable depending on local rules)
- Rubber bands, grommets, and O-rings for coil machines
- Screwdrivers and hex keys for small adjustments
- Multimeter for checking power supply and continuity
- Isopropyl alcohol, green soap, and disinfectant wipes suitable for tattoo stations
- Barrier films, clip cord sleeves, and single-use covers
- Sharps container, biohazard bags and local-compliant waste disposal plan
- Spare springs and contact screws for coil tuning
- Lubricant recommended by the machine manufacturer for rotary cams, if applicable
- Headlamp or focused task light for close inspection
Step-by-step setup checklist (avoid these common issues)
- 1) Incorrect needle depth (too shallow or too deep)
- 2) Loose contact screw or poor spring tension on coil machines
- 3) Wrong voltage setting on the power supply for the chosen work
- 4) Worn grommets, rubber bands, or O-rings causing inconsistent performance
- 5) Bad or frayed clip cords causing intermittent power
- 6) Incorrect needle configuration for liners vs shaders
- 7) Poorly sterilised grips/tubes or improper barrier procedures
- 8) Skipping a test pass on fake skin or practice pad before client work
Each of the items above is a practical mistake that beginners make — and each has a simple preventive step. For example, always test needle depth on a practice pad, and check that springs and contact screws are secure before you clip in the cord. If you use rotary machines, verify the cam and motor mounts are snug; for coils, check the frame is straight and springs are undamaged.
Develop a pre-session routine: new disposable grips or disinfected grips, fresh needles, barrier film, and a functional foot pedal. This reduces stress mid-session and helps you focus on art rather than equipment hiccups.
Common mistakes and how to fix them
Many errors are easy to correct once you know what to look for. Here are practical corrections for frequent issues encountered while learning Tattoo Machine Setup for Beginners.
- Needle blowing out or falling back into the tip: check and reset needle depth and ensure vise or cartridge collar is tightened.
- Uneven lines: for coil machines, inspect spring alignment and contact gap; for rotaries, check stroke length and needle stability.
- Burning sensation on skin: likely too high voltage or needle depth; reduce voltage and retract needle slightly.
- Machine stalls intermittently: swap clip cord for another or test with multimeter to confirm continuity.
- Vibration from the stand or table: add rubber isolation pads under the power supply and machine box.
- Excessive noise from coil frame: tighten mounting screws and ensure springs are not touching the frame in unintended places.
- Poor shading performance: try a lower voltage for smoother ink flow or change to a round shader configuration.
- Inconsistent stroke: check armature bar seating on coil machines and motor mounts on rotaries.
When you hit a problem, use a systematic approach: isolate the component (needle, cord, power supply, machine), replace or test each item, and test on practice skin between adjustments. Logging your settings — voltage, needle depth, machine type — helps you reproduce good setups and avoids trial-and-error during client work.
In the Skinart United States course we provide downloadable checklists and video demonstrations so you can follow along and replicate settings accurately for both coil and rotary rigs.
Tuning your machine — practical steps
Tuning differs between coil and rotary but follows a common principle: small adjustments produce predictable changes. Tattoo Machine Setup for Beginners breaks tuning into clear actions so you can reach consistent performance quickly.
For coil machines, key tuning steps are spring alignment, contact screw gap, and armature travel. For rotaries, focus on stroke length, cam positioning and clip cord connections. Here’s a condensed tuning checklist you can use before every session.
- Secure the machine in a vise or stable mount and test run off the skin to hear the rhythm.
- Set needle depth to the desired protrusion based on the work (liners typically shorter than shading).
- Adjust voltage: start low and increase gradually until the machine feels responsive without causing overwork.
- For coils, gently bend the front spring to alter hit — small movements change spring tension significantly.
- Tighten or loosen the contact screw for a crisp hit; too wide a gap weakens the hit, too close causes shorting.
- For rotaries, check that the motor mount is firm and the cam is aligned with the needle bar to avoid binding.
- Always test on practice skin for at least 30 seconds to confirm ink flow and depth before client contact.
Recording your final settings (e.g., 7.2 V with 0.5 mm needle protrusion on a rotary for a certain shader) speeds up future setups and ensures reproducibility. This is a habit we teach in the online course to accelerate learning and reduce on-the-job mistakes.
Maintenance, cleaning and a quoted industry perspective
Routine maintenance prolongs machine life and keeps your work consistent. For beginners, maintenance is often overlooked — yet it’s essential. Clean grips and tubes between clients, check machines for frayed wires, and regularly replace consumables like O-rings and rubber bands.
Below, you’ll find a short routine that fits before and after each session, as well as a quoted statement from an industry body to reinforce the importance of proper procedures.
“Proper equipment cleaning and safe disposal of sharps are non-negotiable components of professional tattooing. Operators must follow local health department guidance to protect clients and themselves.” — Local Public Health Tattoo Safety Advisory, City of Los Angeles
We also include a maintenance checklist so you can adopt these routines immediately. The Skinart United States online course includes demonstrations on safe cleaning procedures that align with municipal guidance across the U.S.
- Wipe down power supply and surfaces with hospital-grade disinfectant after every client
- Replace disposable grips and tubes; if using autoclavable items, follow steriliser manufacturer instructions
- Inspect and replace clip cords showing wear; test continuity with a multimeter
- Change springs or contact screws that show fatigue or corrosion
- Lubricate rotary motor bearings only with manufacturer-recommended product
- Keep a log of machine service dates and parts replaced
- Ensure all sharps go into an approved sharps container; follow your state and local disposal rules
Safety, regulation and local U.S. examples
In the United States, tattooists must follow state and local health department rules. These rules typically govern sterilisation, sharps disposal, and sometimes bloodborne pathogen (BBP) certification. Tattoo Machine Setup for Beginners includes best practices that align with common U.S. requirements, but you should always check your local public health website for specifics.
Example: In California and many large U.S. cities, studios are inspected and must demonstrate compliant cleaning protocols, sharps management, and record-keeping. Many artists train with accredited providers to meet client expectations and municipal standards; Skinart United States’ certified online course covers the knowledge expected by local regulators.
Success story — a recent student based in Austin, Texas, completed our online tattoo course and used documented setup routines from the training to pass a studio onboarding inspection within two weeks of finishing the module. Small, consistent practices like checklists and test passes make a measurable difference during inspections.
FAQ — Tattoo Machine Setup for Beginners (Coil vs Rotary)
Below are common questions new artists ask about machine setup. Short, actionable answers help you move from reading to doing.
What is the easiest tattoo machine for beginners to set up?
Many beginners find rotary machines easier to set up because they have fewer mechanical parts to tune; you mainly set needle depth and voltage, then test on practice skin. Coil machines require more understanding of springs and contact screw gaps.
What voltage should a beginner use for a rotary machine?
A good starting point is 6.5–8.0 volts for rotaries, adjusting up or down depending on needle configuration and skin response. Always start lower and increase gradually while testing on practice skin before client work.
How do I know if my coil machine spring needs replacing?
If your coil machine loses its crispness, starts to make a spitting or inconsistent hit, or the armature bar doesn’t travel smoothly, springs may be fatigued. Replace springs when you observe play, corrosion, or inconsistent performance.
Do I need certification to set up tattoo machines in the U.S.?
Certification requirements vary by state and county. Many regulators require bloodborne pathogen (BBP) training or documented infection control training. Our accredited online tattoo course includes the knowledge expected by many local authorities, but always confirm local rules.
Does Skinart provide equipment in the United States?
Skinart United States provides accredited online training but does not supply tattoo equipment in the United States. Our course teaches how to choose and set up machines so you can procure the right gear locally.
Final thoughts — take the next step with confidence
Tattoo Machine Setup for Beginners is a practical skill that becomes reliable with repetition, testing, and good habits. Start with the basics — clean workspace, correct tools, test passes — and build from there. Whether you prefer the tactile feedback of coils or the simplicity of rotaries, mastering setup will make you a better artist and a safer practitioner.
If you’re ready to structure your learning and gain accredited knowledge recognised by industry bodies, Skinart United States’ online tattoo course is designed to walk you through these exact steps. You’ll get clear video demonstrations, downloadable checklists, and step-by-step guidance from experienced tutors.
Ready to master your setup?
Enroll in our accredited online tattoo course to learn setup, safety, and technique with expert feedback from Gary and the Skinart team.