How to Practice Microblading at Home (Without a Client)
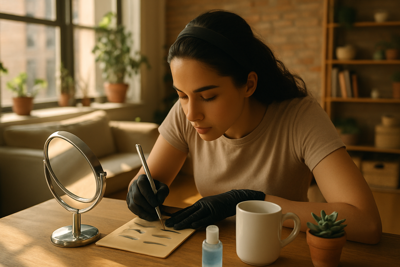
Home study can include assigned microblading exercises on practice materials. Agree on the exercise, equipment and review arrangements with your instructor, and keep practice work separate from offering services to people.
Over the next several thousand words, we’ll offer a comprehensive, step-by-step guide on setting up an effective home practice routine that mirrors studio standards — including tool selection, hygiene, stroke work, practice mediums, common mistakes to avoid, and how to track progress. The tips below are tailored to United States students and reflect safety guidance and accredited training best practices.
Table of Contents
Use the links below to jump to any section. We recommend bookmarking this page and coming back to specific exercises as you progress.
- Why Practice Microblading at Home Matters
- Tools, Materials, and a Studio-Quality Home Setup
- Technique Exercises: Strokes, Pressure, and Angles
- Common Mistakes to Avoid When Practicing Alone
- Sanitation, Aftercare, and Safety at Home
- Tracking Progress: Logs, Photos, and Feedback
- Legal, Insurance, and Local Regulations in the United States
- Frequently Asked Questions
- Final Thoughts & Next Steps
- Skinart United States Microblading Course
Why Practice Microblading at Home Matters
Use home study to complete assigned exercises and collect questions for feedback. A practice session can produce work to review, but does not by itself demonstrate readiness to perform a procedure on a person.
Choose one objective from your assigned lesson and record what you are trying to improve. Use the exercise requirements supplied by your instructor rather than an arbitrary stroke count or angle target.
Practice Microblading at Home also allows you to experiment with ergonomics, lighting, and magnification tools so that when you return to treating clients (or begin doing so after certification), your setup supports precision rather than getting in the way. Skinart United States emphasises that careful, methodical at-home practice is a complement to accredited training — it’s not a substitute for supervised live training when that is required by local regulation.
Tools, Materials, and a Studio-Quality Home Setup
Setting up your home practice station properly is one of the most important steps for safe, productive learning. Good lighting, an ergonomic chair, a stable practice surface, and a magnifier or lamp with a daylight bulb can dramatically improve the quality of each practice session. Remember: while Skinart United States provides accredited online instruction, we do not supply microblading equipment in the United States — students must source their own practice materials through reputable suppliers.
- Pros: Flexible scheduling, no pressure from a live client, the ability to repeat strokes until consistent.
- Limitations: practice materials do not reproduce living tissue, healing or a client consultation. Confirm how feedback is provided and how practical readiness is assessed.
Use the practice material specified for the assignment and follow its instructions. Do not assume that animal tissue or a different synthetic pad is a suitable substitute. Ask before changing materials.
Request the equipment list for the assigned exercise. Confirm tool compatibility, consumables, handling instructions and disposal arrangements before starting. Keep drawing-only supplies separate from equipment used for blade-based exercises.
Technique Exercises: Strokes, Pressure, and Angles
Technique is everything in microblading. Practising microblading at home should focus on three technical pillars: stroke formation, consistent pressure, and correct blade angle. Stroke formation combines wrist movement and finger stability. Begin each session with warm-up strokes on paper or a practice pad: short, medium and long hair-stroke repetitions. Work on tapering the start and finish of each stroke — a realistic hair stroke is not a straight line of uniform thickness.
Do not use a synthetic result to infer a suitable treatment depth or pressure on a person. Ask your instructor how the assigned exercise should be assessed, and use only the materials specified rather than substituting household paint or ink.
Follow the positioning instructions supplied for your assigned exercise. Record questions or a requested view for review rather than experimenting with a fixed set of blade angles from a general article.
- Drawing warm-up specified for the lesson.
- Assigned practice exercise and its review criteria.
- Mapping task appropriate to the current lesson.
- Questions about handling or positioning for instructor review.
- Symmetry exercise: map and mirror two brows on practice skin
- Materials and compatibility checks requested for the assignment.
- Photographs of the assigned work in the requested format.
- Time reserved for reviewing instructions and feedback.
- Video-recorded technique review once per week for self-critique
Common Mistakes to Avoid When Practicing Alone
- Skipping mapping and jumping straight into strokes
- Using dull blades or reusing blades between practice sessions
- Practising without adequate lighting or magnification
- Neglecting sanitation protocols, even for practice
- Changing practice materials without confirming their suitability for the assignment.
- Rushing an exercise to meet a time target before understanding its requirements.
- Failing to document progress with photos and notes
- Comparing early results to advanced artists and giving up too soon
Prepare for the specific assignment using the handling, cleaning and disposal instructions that apply to the equipment. If a step is unclear, resolve it before continuing. A simulated exercise is not equivalent to a client appointment.
Another common trap is perfectionism. In the early weeks, your strokes will be inconsistent. That’s expected. Instead of judging each session harshly, log objective metrics like number of clean strokes, average stroke length, and angle accuracy. Over time, these objective measures will show clear progress even when your eye misses incremental improvements.
Sanitation, Aftercare, and Safety at Home
Even when practising without a client, you must treat sharps and practice instruments with respect. Dispose of used blades in a proper sharps container and follow local regulations for biohazard disposal. Use nitrile gloves and change them when contaminated. Keep a small kit for cleaning and disinfecting your station — surface disinfectant wipes (EPA-registered) are recommended for non-porous surfaces.
- Always wear gloves when handling blades or practice skins
- Use a dedicated, easily cleaned practice surface
- Store pigments and supplies in sealed containers to avoid contamination
- Dispose of used sharps in the appropriate sharps container; follow the applicable disposal instructions for other waste.
- Clean and disinfect reusable tools according to manufacturer guidance
- Label practice materials and avoid using studio pigments on non-approved surfaces
- Keep an incident log in case of accidental cut or exposure during practice
- Adopt a “no food/no drink” policy around your practice area
For a communication exercise, practise explaining the course-provided information and record questions for review. Photograph synthetic work as a practice exercise only: synthetic material does not heal and cannot demonstrate healed results.
Use the preparation checklist supplied for the assignment and keep the relevant equipment instructions accessible. Record missing items or questions before beginning.
Tracking Progress: Logs, Photos, and Feedback
Objective progress tracking separates hobbyists from professionals. Maintaining a practice log helps you identify patterns and areas for improvement. After every session, record the date, the type of exercise performed, total strokes, blades used, skin type (practice medium), and three notes on what went well and what to improve next time. Over weeks and months, these entries will highlight growth and recurring errors.
Photography is essential. Use consistent lighting, the same camera angle, and neutral backgrounds. Label your images with dates and the exercise type. Consider a weekly “progress board” where you pin before-and-after images from the same drill — visually seeing improvements is motivating and an excellent discussion tool for online instructor feedback or peer review.
- Daily log template: date, drill, strokes, notes
- Photo checklist: camera, light temperature, angle, distance
- Weekly review: compare 3 photos from the same drill
- Peer review: share weekly images with a trusted study group
- Instructor feedback: submit labelled photos for critique
- Confidence metric: rate each session 1–10 for technique confidence
- Correction plan: list two specific adjustments for next session
- Record completion of an assigned task and any feedback still outstanding.
Ask the training team how often you can submit work, which format to use and how feedback is provided. Do not assume that a monthly assessment appointment or individualized critique is included without confirmation.
Legal, Insurance, and Local Regulations in the United States
Practicing microblading at home is distinct from offering treatments. In the United States, many states and municipalities have specific licensing, blood-borne pathogen (BBP) training, and sanitation requirements for tattooing and microblading. Before moving from home practice to treating clients, verify your state’s cosmetology, esthetician, or tattooing regulations. Some states require a licensed premises or a specific tattoo establishment permit.
Describe your intended activity and location to your insurer or broker and ask how the policy applies. Do not infer that home practice or client services are covered merely because a policy has been purchased.
Keep practice exercises separate from providing services to clients. Confirm practical assignments with your instructor and check the requirements for any intended business premises with the relevant authority.
Frequently Asked Questions
Below are answers to common queries about how to practice microblading at home without a client. These are phrased the way students often search and are designed to be quick, actionable responses.
Can I really learn to microblade at home?
Yes — you can learn the core technical skills through structured at-home practice, especially when paired with an accredited online course for feedback and theory; however, check local regulations before performing live treatments on clients.
What practice skins are best for beginners?
Silicone practice skins are ideal for beginners because they’re consistent, reusable for non-invasive drills, and safer to handle at home; pigskin gives closer feedback but requires careful handling and disposal.
How often should I practice to get good?
Short, frequent sessions (20–45 minutes, 4–6 times per week) focused on targeted drills are more effective than long, irregular sessions; consistency builds muscle memory and stroke reliability.
Do I need to use real pigment for practice?
No — using washable inks or pigment substitutes for visual feedback on practice skins is common and safer for at-home practice; real pigments are reserved for supervised training and client treatments.
How do I get feedback if I practice alone at home?
Label practice images with the exercise and date, and submit them through the channel requested by your course. Keep feedback with the relevant version of the work.
Final Thoughts & Next Steps
Practising microblading at home without a live client is a disciplined, highly effective way to develop core technical competence. By building small, repeatable drills, tracking progress, and maintaining rigorous sanitation, you create a bridge from theory to confident client work. We recommend combining at-home practice with an accredited course so you can submit work for professional review and ensure you meet local legal and safety standards in the United States.
Use the current online Microblading course page to compare the syllabus and learning arrangements. Ask about equipment, practical requirements and feedback before choosing an option.
Review the course information and resolve any questions about assigned practice and assessment before enrolling.
Skinart United States Microblading Course
Choose your next learning step around the work you need to practise and the support actually available. The current course page and training team can help clarify those arrangements.
Recent Blog Posts
 How to pause a consultation without losing claritySometimes the most useful outcome of a consultation is a clear next step rather than an immediate booking. A calm pause…
 Read product instructions before making a practice planA familiar product name does not tell you everything about its intended use. Product-specific questions belong at the start of planning,…
 Build a practice journal you will actually useA useful practice journal makes the next session easier to plan. It does not need to become a second project or…