Tattoo Linework Practice Techniques for New Artists
Getting clean, confident linework is one of the first skills every aspiring tattooist must master. In this guide we explore practical, repeatable Tattoo Linework Practice Techniques you can use right away — designed specifically for new artists training in the United Kingdom. Whether you’re working from home, attending online lessons, or preparing for your first live client, the methods below will build control, speed and consistency.
These techniques emphasise disciplined practice: deliberate drills, tool selection, hand positioning and troubleshooting common mistakes. They’re drawn from decades of studio experience and tutoring, and are compatible with the Skinart United Kingdom online tattoo course structure. Read on to map out a practice plan you can stick to and measure progress against.
Written by Gary Erskine, 25 years in Tattoo Linework Practice Techniques education — accredited tutor with CPD and BAQA — this article is a practical handbook, not theory-heavy. If you want tailored instruction, our accredited online Tattoo course in the UK is designed to guide you from these drills through to a professional standard.
Table of Contents
Use these anchor links to jump to sections — helpful for study sessions and for Google “Jump to” results.
Tip: bookmark this page and return to the drills section before every practice session.
- Understanding Linework Fundamentals
- Tools and Materials: What to Choose
- Daily Practice Routines and Drills
- Common Linework Mistakes to Avoid
- Practice Surfaces and Alternatives
- Developing Consistency — Exercises & Mentoring
- UK Case Study: From Rookie Lines to Cleaner Work
- FAQs — Tattoo Linework Practice Techniques
- Final Thoughts & Next Steps
Understanding Linework Fundamentals
At its core, Tattoo Linework Practice Techniques are about control — control of speed, needle depth, angle and rhythm. Linework is the skeleton of most tattoo styles (traditional, blackwork, illustrative), so early investment in lines pays exponential dividends later. When you look at masterful tattoos, the smoothness of the lines is what first reads as professional.
For new artists, linework training should start with simple marks and progress methodically: single straight lines, consistent curved lines, and then complex forms. Each practise element isolates one variable — hand position, machine speed, grip tension — so you can correct it without confusing results.
In the UK context, good linework is also a matter of health and client confidence. Clean, predictable lines reduce the need for multiple passes, which lowers trauma to the skin and helps reduce healing issues. These techniques complement the infection control and client care modules you’ll find in accredited courses including our Skinart online Tattoo course for the United Kingdom.
Tools and Materials: What to Choose
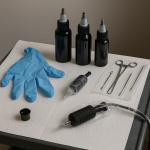
Choosing the right tools for linework practice is more about consistency than cost. For beginners in the UK we recommend starting with a reliable, well-known coil or rotary machine from reputable brands, paired with standard liner needle groupings (e.g., 3RL, 5RL, 7RL). Practice cartridges that mimic your studio setup help you translate drills to client work.
- Pros: Familiar equipment improves muscle memory; you’ll learn what to expect at the machine.
- Cons: Beginners sometimes over-invest early; a mid-range machine and cartridges are enough for practise.
Skinart United Kingdom students often ask whether to start with cartridges or traditional needles. Both work — cartridges allow quick changes and are common in many UK studios, while traditional needles are cheaper and great for foundational work. The decisive factor is repetition: pick one system and practise consistently rather than switching frequently.
Remember: Skinart UK does not supply tattoo equipment. Our course content teaches you how to choose and maintain equipment, but you should purchase your practising kit locally or from trusted UK retailers. Also check local council guidance and UK Health Security Agency materials on skin piercing for regulatory context.
Daily Practice Routines and Drills
Consistent practice beats occasional marathon sessions. Set a realistic daily routine: 30–60 minutes focused on specific linework drills, followed by review and notes. Keep a training log that records speed, depth, and needle choice for each drill — tracking accelerates improvement.
Start each session with warm-up marks on practice skin or paper, then move into targeted exercises. Gradually increase complexity: straight lines, circles, flowing curves, cross-hatching, and finally, freehand shapes. Regular short sessions are less fatiguing and encourage deliberate learning.
Below are drilled exercises you can rotate through each week. Aim to master each entry before adding complexity rather than spreading your attention thin across many incomplete skills.
- Straight-line sets: 20 lines in a row, maintaining even pressure and spacing.
- Parallel lines: 10 passes at consistent spacing (3 sets).
- Circles and ovals: clockwise and anti-clockwise, 15 each direction.
- Controlled curves: S-curves and wave patterns to build wrist mobility.
- Micro-lines: tiny straight lines with fine liners for precision control.
- Speed control drills: repeat the same line at three different machine speeds.
- Needle-depth awareness: practise maintaining depth on angled practice skins.
- Freehand shapes: outline simple icons (stars, leaves) freehand to simulate stencils.
- Line weight variation: practise intentional thin-to-thick transitions for illustrative tattoos.
- Cross-hatching and simple shading edges: learn how lines transition into tone.
Common Linework Mistakes to Avoid
- Pushing the needle too deep (causes blowouts).
- Inconsistent machine speed during a single stroke.
- Uneven hand pressure causing wobbly lines.
- Incorrect grip leading to wrist tension and tremor.
- Poor angle relative to the skin causing patchy ink deposit.
- Starting with overly complex designs before mastering fundamentals.
- Not practising on different surface tensions (e.g., curved vs flat areas).
- Overworking lines with repeated passes instead of correcting technique.
- Neglecting aftercare and healing differences when testing on live skin.
- Relying on tracing only — lack of freehand skill development.
Each of these mistakes is fixable with targeted practice. For example, if you’re experiencing blowouts, reduce needle depth and slow your stroke. If lines wobble, check your grip — use a relaxed tripod hold and pivot from the elbow rather than the wrist for longer lines.
It’s also helpful to record practice sessions (video) and review the footage. Many students in the UK find it illuminating to compare their hand motion to reference videos provided in accredited online modules, which point out subtle posture errors. If you’re training with Skinart, tutors will review recorded work and suggest correctives within the course feedback loop.
Practice Surfaces and Alternatives
Choosing the right practice surface is essential to replicate how skin behaves under a needle. Synthetic practice skins, pigskin, and fruit (e.g., oranges) are all useful at different stages. Each surface teaches something different: paper strengthens line confidence, practice skin mimics stretch and resistance, and living skin requires sterile technique and is only suitable once you’re ready.
Below is a list of common practice surfaces and when to use them. Note: in the United Kingdom, local regulations and studio policies govern working on live models — always follow guidance provided by local councils and health agencies.
- Smooth printer paper — for warm-up and line confidence with a pen or brush.
- Tracing paper — perfect for repeating a stencil freehand and building muscle memory.
- Silicone practice skins — high-repetition, non-living practice for needle behaviour.
- Pigskin (where legally available) — closer to human skin texture but handled with food-safety considerations.
- Fruit (orange, banana) — useful for practicing penetration angle and depth awareness.
- Latex gloves filled and stretched — to simulate curved areas like forearms.
- Foam pads — cheap and good for practicing pressure control without ink mess.
- Real skin practice only under supervision — once you have sufficient competence and follow council regulations.
- Digital practice apps — for studying line composition and speed control without needles.
Developing Consistency — Exercises & Mentoring
Consistency is the product of repetition plus targeted feedback. Exercises are useful, but receiving critique from an experienced tutor compresses learning time dramatically. In our online modules, students submit practice sheets and receive guided feedback on grip, speed, and needle choice.
Pair practice sessions with regular feedback loops: log your drills, mark what went wrong, make one small correction, and repeat. Over time these micro-corrections compound into consistent technique. If you’re based in the UK, look for accredited providers (CPD, BAQA) when choosing online mentoring to ensure content aligns with industry expectations.
Below are specific mentoring-focused exercises you can do with a remote tutor or peer review group. They’re designed to maximise the value of each feedback session.
- Submit 10-line sets and ask the tutor to rate smoothness and evenness.
- Record a 60-second video of your arm, grip, and stroke — tutors often spot posture issues not visible in photos.
- Do timed drills — same line executed at 3 different tempos, then compare results with your mentor.
- Exchange critique with a peer group to develop an eye for line quality.
- Maintain a “fix log”: write the one change you’ll implement next session (e.g., “relax thumb pressure”).
- Set measurable goals for speed and accuracy, then test weekly.
- Request progressive assignments from your tutor to bridge gaps from practice skin to live work.
- Use comparative grading: place your work next to a trusted reference and annotate differences.
“Deliberate practice plus timely feedback is the fastest route from shaky lines to consistent work.” — Gary Erskine, Lead Tutor, Skinart United Kingdom
UK Case Study: From Rookie Lines to Cleaner Work
One Skinart United Kingdom student, “Alex” (apprentice name withheld), began with hesitant shaky lines and inconsistent depth. Over a 12-week structured practice plan that combined daily drills, weekly tutor reviews and progressive stencil work, Alex’s lines smoothed and healed more predictably.
The turning point was a focused two-week block concentrating solely on parallel straight lines and slow-speed muscle memory exercises. Alex reduced pressure inconsistencies and rebuilt the stroke into a confident, single-pass technique. He then applied the same approach to curved work and micro-lines, achieving better client outcomes.
This example highlights how measurable practice objectives plus accreditation-aligned feedback (from tutors who understand UK studio expectations) accelerate progress. Many students in the UK have followed similar trajectories using the Skinart online course, which aligns its exercises to local regulatory norms and professional standards.
FAQs — Tattoo Linework Practice Techniques for New Artists
Below are frequently asked questions new artists in the UK ask about linework practice. Each answer is short and actionable to help you make immediate improvements.
How often should a beginner practice linework?
Aim for 30–60 minutes daily focused on targeted drills; shorter, consistent sessions beat infrequent long ones, and daily repetition builds muscle memory faster.
Which needle sizes should I start with for line practice?
Begin with small liner groupings like 3RL and 5RL for fine control, then introduce 7RL for slightly heavier outlines—consistency in practice with the chosen needles is key.
Can I practice linework at home in the UK safely?
Yes, you can practice on synthetic skins and non-living surfaces at home; ensure sterile handling of equipment and avoid practising on live skin until you have appropriate supervision and meet local regulations.
How do I stop lines from wobbling?
Relax your grip, pivot from the elbow for longer strokes, stabilise your support hand on the skin, and practise slow, deliberate lines to develop steadiness before increasing speed.
What feedback should I ask from my tutor about my linework?
Request specific feedback on needle depth, line smoothness, consistency of speed, and any visible skin trauma; ask for one corrective action per session to focus your practice.
Final Thoughts
Mastering Tattoo Linework Practice Techniques is a journey, not a race. The difference between a good tattooist and a great one is often attributable to countless small repetitions focused on improvement. Adopt a practice routine, seek regular feedback, and be patient with progress — it compounds.
Skinart United Kingdom has designed its online Tattoo course to support this journey with targeted modules, tutor feedback and structured drills that map directly to the techniques described here. If you’re serious about turning practice into reliable studio-level linework, consider enrolling — our tutors will guide your progression with accreditation recognised by CPD and BAQA.
Take one small step today: commit to a 30-day practice log, and watch the lines improve. You’ve already taken the first step by learning the approach — now make it routine.
Ready to improve your linework?
Join our accredited online Tattoo course tailored for students in the United Kingdom. Structured drills, expert feedback from Gary Erskine and practical assessments will build your confidence and industry-ready skills.
Recent Blog Posts
- Studio Etiquette Update: Professionalism in 2026
 Workplace Etiquette for Body Art Studios Refresh your studio etiquette and build a reputation for professionalism with these up-to-date best practices.… Read More »Studio Etiquette Update: Professionalism in 2026
 - 🌙 Eid Mubarak: Celebrate with 5% Off in 2026!
 Eid Savings: 5% Off All Courses Celebrate Eid with a special offer: 5% off any course. Use code EID5 at checkout.… Read More »🌙 Eid Mubarak: Celebrate with 5% Off in 2026!
 - Top Mistakes New Body Artists Should Avoid (2026)
 Stay Ahead: Common Pitfalls for New Artists Read up on the most frequent errors new body artists make, and how to… Read More »Top Mistakes New Body Artists Should Avoid (2026)