Best Tools for Ear Piercing Students
Whether you’re starting our Ear Piercing course in Australia or learning on your own, choosing the right kit and tools is essential. The Best Tools for Ear Piercing Students will keep clients safe, reduce complications and speed up your learning curve. In this detailed guide we cover everything a trainee needs to succeed — from sterile consumables to ergonomic hand tools and the best practice workflow.
This article is written for students training online with Skinart Australia and for new piercers working in studios or mobile settings around Australia. We’ll highlight items that matter in the real world, explain why they matter, and point to professional standards so you can work confidently and legally.
Written by Gary Erskine, lead tutor at Skinart Australia with 25+ years in body art education and thousands of students trained worldwide. The guidance below reflects accredited course content and practical experience gained across Australian clinics and training rooms.
Table of Contents
- Core concepts: safety, consent and tool selection
- Pros & cons: disposable versus reusable tools
- Essential tools and consumables for students
- Common mistakes and how to avoid them
- Sterilisation & infection control
- Workflow, ergonomics and set-up
- Sourcing tools in Australia (what you can and cannot get)
- FAQs — Best Tools for Ear Piercing Students
- Final thoughts & next steps
Use these anchor links to jump to sections — search engines may display “jump to” links for key queries.
Core concepts: safety, consent and tool selection
Understanding the Best Tools for Ear Piercing Students starts with safety and client-centred practice. Choosing the right tools is not just about convenience — it’s about reducing infection risk, ensuring correct placement and giving your client a comfortable experience. In the Skinart Australia Ear Piercing course we teach tool selection alongside communication, consent and aftercare protocols so students learn why each item matters.
When you are training, the wrong instrument or poor ergonomics can hinder learning. For example, blunt forceps or poorly balanced hand-pieces make it harder to feel tissue tension and placement; that directly affects accuracy. That’s why our curriculum emphasises a small set of high-quality instruments and standardised consumables that every student should become familiar with.
Finally, always remember legal obligations and local health guidance. Australian clinics must follow state and territory public health guidelines on skin penetration procedures and infection control — using approved tools and clear consent forms is part of compliance and good practice.
Pros & cons: disposable versus reusable tools
One of the first choices students face is whether to rely on disposables or invest in reusable instruments. Each approach has trade-offs in cost, environmental impact and infection-control workflow.
- Disposables — Pros: Sterile out of the pack, minimal reprocessing, reduced cross-contamination risk for novice setups.
- Disposables — Cons: Higher recurring cost, more plastic waste, limited tactile feedback compared with high-quality metal tools.
- Reusable — Pros: Long-term value for dedicated practitioners, better balance and feel, lower waste.
- Reusable — Cons: Requires validated sterilisation (autoclave), tracking, and strict cleaning procedures — which pose challenges if you’re training in a small or shared workspace.
For students in Australia training online, we recommend starting with a curated mix: high-quality reusable instruments for skill development (forceps, needle holders, tuning tools) combined with sterile disposable consumables for each client (single-use, sterile studs, antiseptic wipes, gloves). This hybrid approach balances learning needs with safety and economics.
Skinart’s Ear Piercing course covers both pathways and shows you how to set up a compliant workflow whether you choose disposables or reusables. Note: Skinart Australia does not supply ear piercing equipment within Australia — we teach which tools to source and how to confirm their specifications before purchase.
Essential tools and consumables for students
Below is a comprehensive list of tools and consumables that form the foundation for safe, professional ear piercing practice. These are the Best Tools for Ear Piercing Students because they support repeatable, safe procedures and good aftercare outcomes.
When you buy tools, prioritise CE/ISO markings where applicable, and buy sterile consumables from reputable local Australian suppliers. If you’re unsure which brands to choose, the Skinart Australia course provides supplier checklists and purchasing criteria used by professional studios.
Core set for training and early practice includes both instruments and disposables. Master these items first; additional gear can be added as you progress.
- Sterile ear piercing studs or single-use titanium/medical-grade earrings (various gauge sizes appropriate for lobes) — always sterile-packaged.
- Single-use needles (needle-and-cannula sets where appropriate) — avoid improvised piercing guns for safety reasons.
- Fine surgical forceps (straight and curved) — quality stainless steel with good jaw alignment for accurate tissue handling.
- Needle holders / hemostats — for secure needle control during placement and withdrawal.
- Antiseptic solutions (chlorhexidine or povidone-iodine alternatives as per state guidance) and sterile saline for wound care.
- Disposable nitrile gloves, varied sizes, and face masks — single pair per client; change as needed during procedures.
- Sterile gauze, adhesive bandages, micropore tape, and aftercare dressing materials.
- Disposable speculums or positioning aids and soft clamps designed for lobes to stabilise the tissue without crushing.
- Clean, height-adjustable chair and bright task lighting (a surgical-style headlamp is a great investment).
- Sharps container and biohazard disposal protocol aligned with local council rules.
- Autoclave (only if you plan to use reusable instruments) and biological indicators for validation (training covers how to document cycles).
- Consent forms, medical questionnaire templates and client aftercare leaflets (customised for Australian regulations and language).
Common mistakes students make (and how to avoid them)
- Using non-sterile or expired consumables — always verify expiry and sterilisation seals.
- Incorrect placement due to poor marking or uneven tissue tension — practice with forceps and marking pens.
- Relying on piercing guns or inappropriate devices — guns often cause more tissue trauma and are discouraged in clinical settings.
- Skipping a full medical history — allergies, diabetes and immune conditions affect healing and tool choice.
- Poor aseptic workflow (e.g., touching sterile studs after handling non-sterile items) — establish a clean-to-dirty sequence.
- Inadequate lighting and poor ergonomics — bad posture and lighting increase error rates.
- Improper sharps disposal — puts staff and clients at risk and breaches local regulations.
- Not providing clear aftercare instructions — poor aftercare drives infection and client dissatisfaction.
Most of these mistakes are avoidable by following a consistent setup and practice routine. In our Ear Piercing course we provide checklists and simulated practice scenarios so students build reliable habits before treating paying clients.
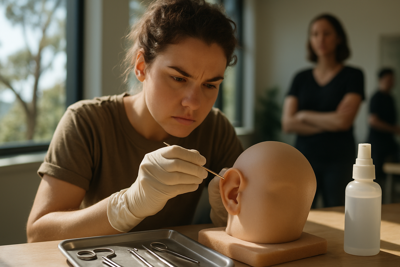
Students should practice marking and handling instruments repeatedly on models or synthetic skin substitutes. This develops the tactile awareness needed to use tools like forceps and needle holders precisely — and reduces the risk of a misplaced piercing in a live client.
Sterilisation and infection control essentials
Infection control is central to the Best Tools for Ear Piercing Students: a tool is only as good as the way it is handled. For disposable consumables, verification of sterile packaging and single-use labelling is mandatory. For reusable instruments, validated autoclave cycles, cleaning logs and biological indicators are required. The course teaches documentation methods that satisfy Australian council expectations.
Key practical controls include a clean-to-dirty workflow, single-handed handling of sterile items, use of barrier protection (gloves, masks), and immediate sharps disposal. These small procedural habits dramatically reduce risk when repeated consistently.
- Follow manufacturer sterilisation recommendations for all reusable instruments.
- Run biological indicators weekly on autoclaves and keep cycle records.
- Always use a designated clean tray for sterile consumables and avoid cross-contamination.
- Use single-use items where validation of sterilisation is not feasible in your workspace.
- Comply with local council waste disposal guidelines for clinical waste and sharps.
Workflow, ergonomics and set-up
Good set-up and ergonomics make it easier for students to focus on accurate placement and client comfort. That’s why the Best Tools for Ear Piercing Students list includes not just needles and studs but lighting, chairs and positioning aids. A stable environment reduces anxiety for both you and the client.
Arrange your workspace so sterile items are on one side and waste on the other; have a small tray for used gauze and another for sharp disposal. Keep your dominant hand free to perform the procedure and your non-dominant hand to stabilise the ear with forceps — this creates a repeatable rhythm that students quickly learn.
“Consistency in workspace layout is one of the simplest steps that separates amateurs from professionals.” — Gary Erskine, Skinart Australia
- Bright, adjustable LED light or headlamp
- Comfortable, adjustable seating for client and practitioner
- Two trays (sterile and dirty) and a dedicated sharps container
- Pre-marking pens that are surgical grade and easily removed
- Soft lobe support pads to keep the ear stable without pressure points
Sourcing tools in Australia (what you can and cannot get)
Students often ask where to buy recommended tools. Australia has reputable local suppliers of sterile consumables and quality instruments, but import restrictions and supply chains vary by state. The Best Tools for Ear Piercing Students list includes items commonly available from Australian clinical suppliers and specialised body-art distributors.
Important: Skinart Australia does not supply ear piercing equipment within Australia. We provide detailed supplier checklists, specifications and purchase guidance in our course so you can source items locally and verify compliance with Australian standards.
When sourcing, prioritise Australian suppliers for quicker delivery and local compliance. For infection control guidance, you can refer to the Australian Government Department of Health resources on clinical waste and infection prevention (https://www.health.gov.au) for general principles that apply across jurisdictions.
FAQs — Best Tools for Ear Piercing Students
Common questions students ask about tools, safety and sourcing are answered below. These are practical, short answers designed to help you study and prepare for placements in Australia.
Frequently asked questions
What tools should I buy first? Start with sterile consumables (studs, needles), a pair of quality forceps and reliable lighting. Add an autoclave only if you plan to use reusable instruments and can manage validated sterilisation.
How many sizes of studs should I stock? Begin with 16G and 18G studs for earlobes; if you plan to offer upper ear piercings, include smaller gauges appropriate for cartilage, and always follow client preference and anatomy.
Do I need medical indemnity? While not a tool, indemnity and appropriate insurance are essential in Australia — check state requirements and studio policies before offering services to the public.
Final thoughts & next steps
Mastering the Best Tools for Ear Piercing Students takes time and repetition. Start with the essential items listed above, create a clean and repeatable workflow, and practise placement and handling on models before moving to live clients. The combination of sound tools and disciplined procedure is what builds safe, repeatable results.
If you’re training in Australia, remember to check state and territory guidelines on skin penetration, waste disposal and local council requirements. The Skinart Australia Ear Piercing course gives you the knowledge and templates to document your practice and satisfy local regulations.
Ready to gain accredited training and a clear roadmap to sourcing the right tools? Join our online Ear Piercing course designed for Australian students — we’ll guide you through theory, practical technique and professional practice so you graduate capable and confident.
Get started with Skinart Australia
Enroll in our accredited online Ear Piercing course and learn tool selection, infection control, consent and placement from experienced tutors. All courses are CPD and BAQA-aligned — study at your pace and build a professional foundation.